
Your shopping cart is empty!
Long Hunter Ruger Single Action Centerfire Extended Firing Pin and Lightened Return Spring Kit

Product Code: Long Hunter Extended Firing Pin and Spring
Availability: In Stock
Availability: In Stock
Price: $15.00
Qty:
- OR -
Add to Wish List
Add to Compare
Add to Compare
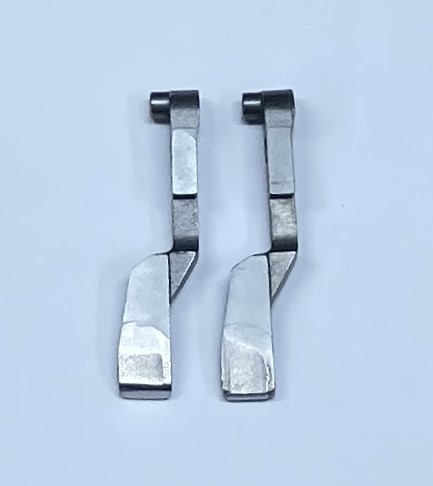
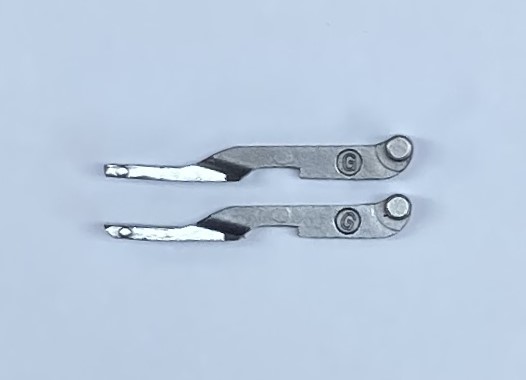
The Long Hunter Ruger Centerfire Extended Firing Pin and Lightened Return Spring Kit is a field-proven reliability upgrade engineered to deliver absolute ignition reliability. Proven in our custom action shop for several years, this premium kit completely overcomes factory headspace issues. Due to its increased length and paired lightened return spring, it strikes the primer with significantly more force to eliminate light primer strikes and misfires.
In addition to superior ignition, this extended pin eliminates unnecessary mechanical shock. It rides directly against the transfer bar, removing the factory gap to stop metal-on-metal frame slamming when the hammer drops.
Universal Ruger Centerfire Compatibility:
Precision-machined to perfect factory tolerances, this kit is designed exclusively for centerfire single-action revolver frames (including old and new models). It drops seamlessly into centerfire versions of:
Precision-machined to perfect factory tolerances, this kit is designed exclusively for centerfire single-action revolver frames (including old and new models). It drops seamlessly into centerfire versions of:
- Ruger Vaquero & New Vaquero
- Ruger Blackhawk & Super Blackhawk
- Ruger Bisley & Bisley Vaquero
- Ruger Single Six (Centerfire models only, such as .32 H&R Mag / .327 Fed Mag)
- Super Blackhawk Hunter
Please note: This kit is engineered strictly for centerfire frames and will not fit rimfire .22 LR / .22 WMR models.
Transfer Bar Modification Note:
To ensure 100 percent smooth function with the extended design, a slight modification to the top of your factory transfer bar is recommended. File, stone or machine a 45-degree angle at the top edge of the transfer bar. (Please reference the product photos above to view the visual difference between a modified and unmodified transfer bar).
To ensure 100 percent smooth function with the extended design, a slight modification to the top of your factory transfer bar is recommended. File, stone or machine a 45-degree angle at the top edge of the transfer bar. (Please reference the product photos above to view the visual difference between a modified and unmodified transfer bar).
Step-by-Step Installation Instructions:
Step 1. Completely disassemble the revolver.
Step 2. Use a Sharpie to mark a cross on the recoil shield so it is easy to line up perfectly during reinstallation.
Step 3. Mount the revolver frame in a padded vise. Using a 1/16-inch long punch on the loading gate side, drive out the pin holding the recoil shield. Do not drive it all the way out; stop once the end of the pin clears the recoil shield.
Step 4. Use a 1/8-inch punch to carefully drive out the factory firing pin and recoil shield.
Step 5. Drop in your new Long Hunter extended firing pin and lightened return spring. Line up the recoil shield by looking down through the muzzle, using the cross-marks previously made by the Sharpie.
Step 6. Guide a 10-inch brass rod through the barrel and tap the recoil shield firmly back into place.
Step 7. Use the brass rod or a short brass punch to tap the retaining pin securely back into its original position.
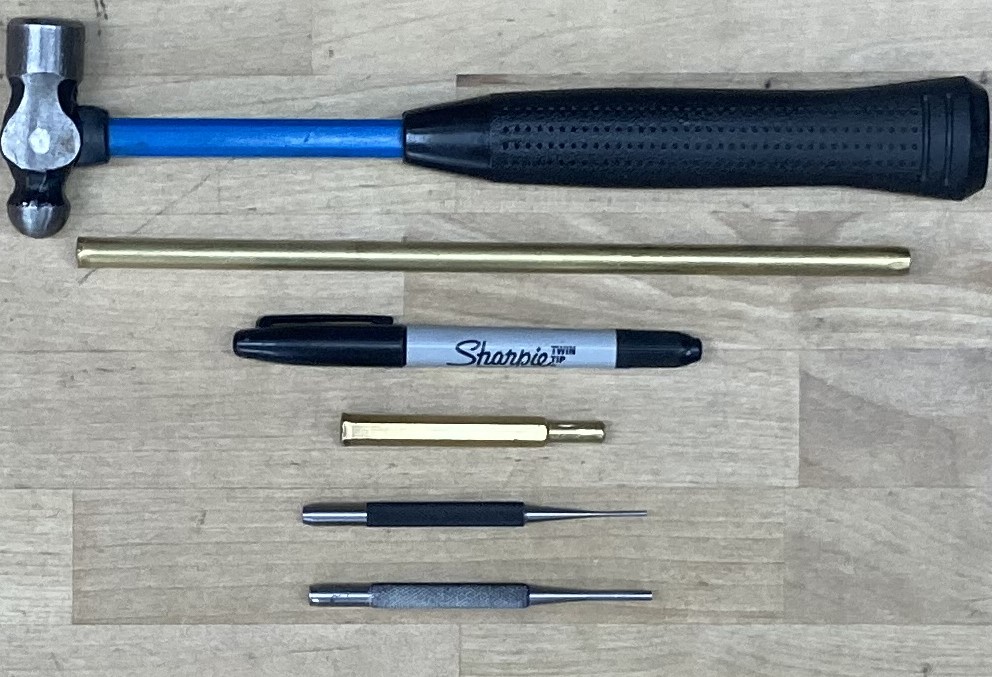
Installation Tools:
- Hammer
- 1/16 inch punch
- 1/8 inch punch
- Sharpie marker
- 10 inch brass rod
- Short brass punch
My Installation Tools:
Hammer, 1/16" and 1/8" punch, Sharpie, 10" brass rod and short brass punch.
Long Hunt © 2026